The Slab-Approval Moment
“Are we inspecting marble… or are we just admiring it?”
That question came from a project manager during a slab approval meeting. The architect loved the veining. The owner loved the photos. But the contractor only cared about one thing: whether the stone would arrive on site consistent, safe to fabricate, and stable under real use.
That’s the real world of High-Quality Marble. Luxury projects don’t fail because the marble is “ugly.” They fail when texture is inconsistent, hidden weaknesses crack during fabrication, or the surface luster changes after installation and cleaning. This guide breaks down a practical, specifier-friendly inspection method—based on measurable checks, field habits, and sourcing discipline aligned with icestone’s project workflow. If you’re starting your shortlist or building a technical baseline, it helps to begin with the icestone selection so your inspection criteria match what can actually be supplied and repeated.

Marble quality inspection
Why “High-Quality Marble” Needs a Real Inspection Standard
In premium construction, marble is often approved too emotionally: “It looks good—ship it.” But marble is a natural material, and visual beauty can hide performance risk.
The most common quality problems in marble supply and installation are:
-
Micro-cracks that only show up during cutting and edge profiling
-
Vein zones that behave like natural fault lines if layout direction is ignored
-
Inconsistent luster across batches, especially after sealing and cleaning
-
Uneven density/porosity that leads to patchy staining or water marks
-
Fill repairs that look fine in a warehouse but flash under site lighting
Professional stone teams reduce risk by using a repeatable inspection system that combines appearance checks (texture, pattern, consistency) with technical checks (hardness, porosity behavior, finish quality, thickness tolerance). For reference and consistency across projects, it’s common to browse stable series under marble slabs and then apply a unified inspection checklist to every batch.
The Three Core Standards: Texture, Hardness, Luster
1) Texture: What You’re Really Approving
Texture isn’t only “veining.” It includes grain structure, mineral distribution, and how consistent the slab looks from a distance.
Texture inspection checklist
-
Step back 3–5 meters: does the slab read calm or chaotic?
-
Check for “hot spots”: concentrated vein clusters that may weaken edges and corners
-
Compare slabs side-by-side: do undertones match, or do some run warmer/cooler?
-
Look for heavy resin fills: are there glossy fill lines that will show under lighting?
-
Confirm orientation potential: can veins be aligned for stair treads, counters, or wall panels?
Field tip: If the project has big visual surfaces (lobby floors, feature walls), texture consistency matters more than “one perfect slab.” Approve the batch behavior, not the hero piece.
2) Hardness (and What It Means in Real Projects)
In marble buying conversations, “hardness” often gets oversimplified. You’re not buying a laboratory sample—you’re buying performance under foot traffic, impacts, and fabrication stress.
What to check practically
-
Edge behavior: does it chip easily during sample cutting?
-
Scratch sensitivity: does it show visible lines under controlled abrasion?
-
Structural weakness at veins: do thin offcuts snap along a vein line?
-
Thickness tolerance: does the slab maintain consistent thickness across the plane?
Why this matters: Hardness-related issues often show up as:
-
chipped edges around doorways and thresholds
-
cracked cutouts at sinks and cooktops
-
stair nosing damage in public zones
-
“mystery cracks” after installation that are actually vein weakness + stress points
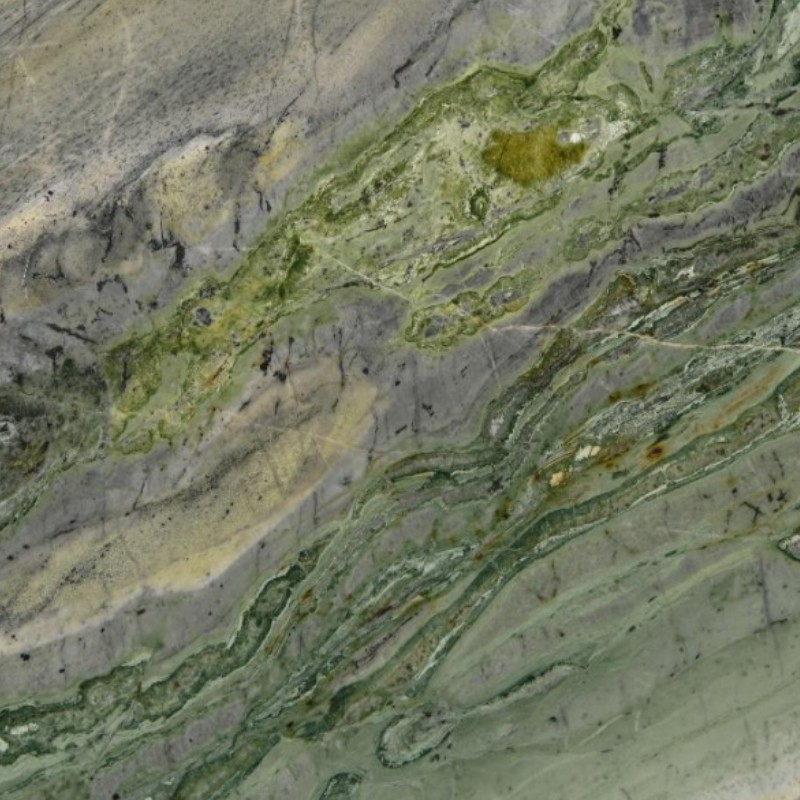
If your project includes strong-color marbles, inspect them with extra discipline. For example, character stones like Antique Green Marble often create spectacular visual results—but the inspection must confirm predictable texture zones and safe layout direction for edges, corners, and cut lines.
3) Luster: What the Client Will Notice First
Luster isn’t just “polish.” It’s the uniformity of reflection across slabs and the stability of that finish after installation, sealing, and cleaning.
Luster inspection checklist
-
View under raking light: do you see waves, roller marks, or patchy shine?
-
Compare reflection clarity between slabs: are some duller than others?
-
Check for “burn marks” from polishing that may appear as haze later
-
Evaluate finish stability: ask how the finish behaves after sealing and neutral cleaning
-
Confirm the finish spec for scenario: polished on walls may be fine; on wet floors it can become a risk
Field tip: Always check luster under lighting similar to the final site. Warehouse lighting can flatter slabs; hotel downlights can expose every inconsistency.
 |
 |
The Inspection Process That Works on Real Projects (Not Just in Theory)
Here’s a practical inspection flow used by project teams who want fewer claims later:
-
Batch review first: see multiple slabs, not one sample
-
Texture consistency check: compare undertones and vein rhythm
-
Defect scan: look for cracks, fills, pinholes, fissures, resin lines
-
Thickness and flatness: confirm tolerance across the slab
-
Finish/luster test: check reflection under raking light
-
Water/porosity behavior: light water test on offcut (when allowed)
-
Mock layout: preview how slabs will sequence in the actual space
-
Document everything: slab IDs, photos, notes, approved zones
If you want the process to move fast while remaining controlled, the smartest approach is to set expectations early and confirm how slabs will be selected, matched, and shipped. That’s why many teams contact icestone before final approval—so selection criteria and production constraints align.
Case Logic: “Where High-Quality Marble Comes From” Is Part of Inspection
Inspection isn’t only physical—it’s also about sourcing credibility. The most reliable projects reduce variability by working with stable quarry output and documented supply routes.
For example, if the project requires a specific green tone that must remain consistent across floors and vertical surfaces, it’s not enough to approve a showroom sample. You need to understand sourcing and matching strategy. That’s why guides like Ming Green Verde Ming Marble are valuable: they help buyers think about where consistent material is typically found, how batches vary, and how to avoid mismatched deliveries.
Comparing Three “Luxury Behaviors” in Marble Selection
Different luxury marbles behave differently in texture, finish, and visual response. Here’s a specifier-friendly way to think about it:
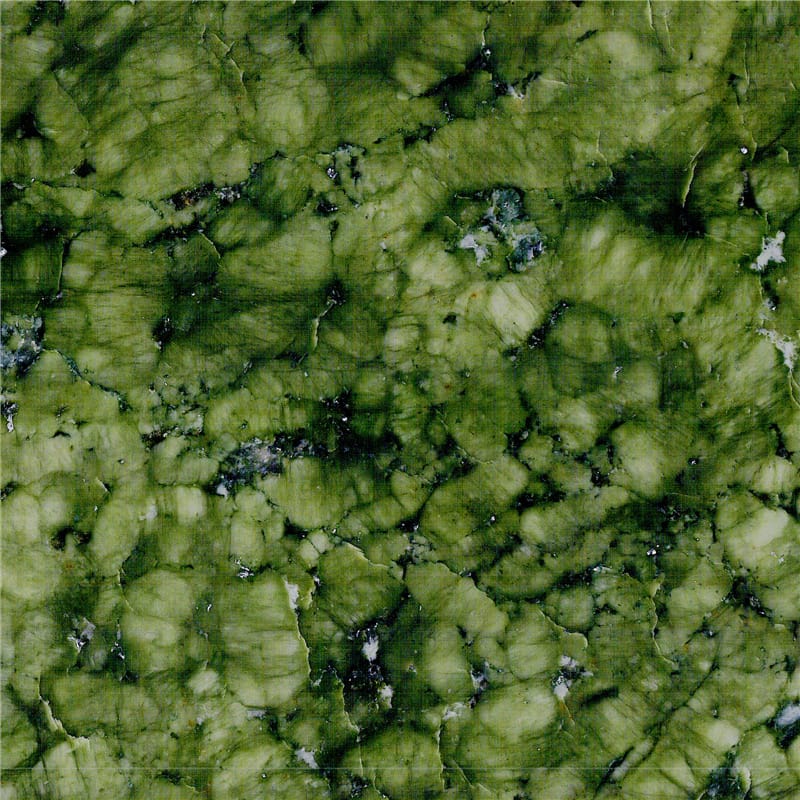
-
Green marbles often deliver calm authority, but require strict batch matching
-
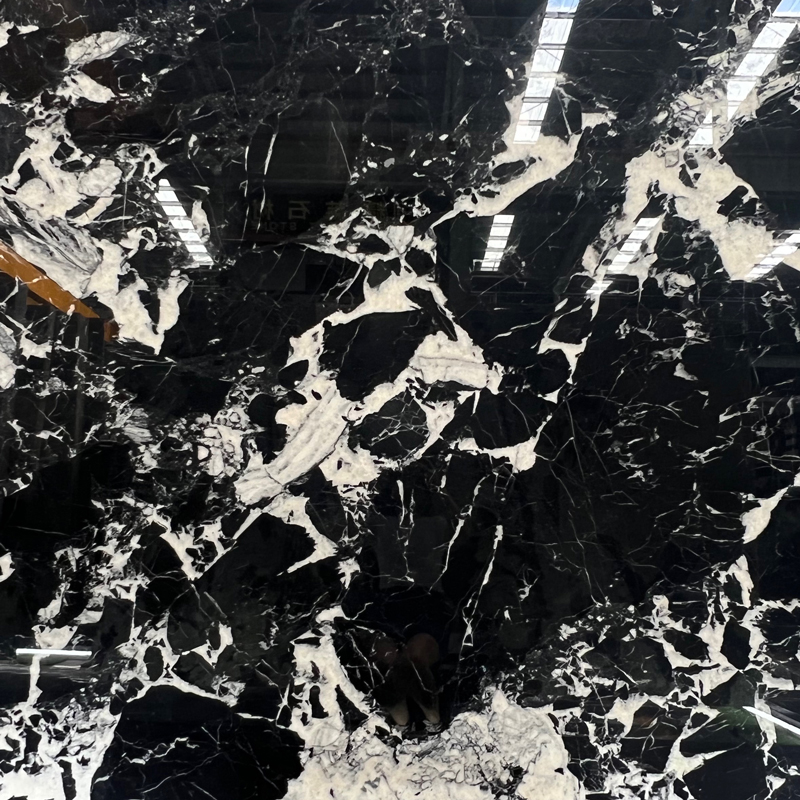
White/purple luxury marbles create high-end contrast, but need careful luster consistency
-
Translucent onyx-style materials create wow-factor, but demand disciplined finish and backlighting coordination
If your project uses a high-contrast, design-forward selection like Calacatta Viola Marble, your inspection focus should include:
-
vein direction planning for cutouts and corners
-
luster uniformity across the batch
-
fill visibility under final lighting
-
edge behavior during fabrication
And if the space includes feature areas with lighting-driven stone, a product like Backlit Blue Onyx Slab demands another layer of inspection:
-
translucency consistency across slabs
-
thickness control (critical for even backlighting)
-
finish stability and surface clarity
-
allowance for lighting system tolerances behind the slab
The “Red Flag” List: When to Reject a Slab (Even If It Looks Beautiful)
Use these as non-negotiables for premium projects:
-
A crack line that continues across the slab and aligns with a future cut zone
-
Heavy resin repairs that flash under raking light
-
Uneven luster that cannot be corrected without re-polishing
-
Noticeably different undertone from slab to slab when side-by-side
-
Thickness variation that causes lippage risk in floors or panel alignment issues on walls
-
Pinholes/clusters that suggest unstable porosity behavior in wet zones

Dreaming-Green-Marble
FAQ
1) How do I check if marble is high quality?
Inspect batch consistency, defect levels (cracks/fills), thickness tolerance, and finish uniformity. High-quality marble should look consistent at full slab scale and behave predictably during fabrication.
2) What should I look for when inspecting marble slabs?
Focus on texture rhythm, undertone consistency, resin fills, micro-cracks, thickness variation, and luster stability under raking light. Document slab IDs and photos for approval records.
3) Does polished marble always mean better quality?
Not necessarily. A polished finish can hide certain issues under warehouse lighting. Quality is about stable texture, safe structure, consistent finish, and predictable performance—not just shine.
4) How can I prevent marble from looking patchy after installation?
Batch-match slabs, maintain consistent finish and sealing approach, and test under final lighting. Avoid mixing slabs with different undertones, especially in large continuous surfaces.
5) What’s the best way to ensure consistent marble supply for large projects?
Work with a supplier who can manage block selection, batch control, layout planning, and documentation. Approve the batch, not just a single sample, and plan sequencing before fabrication.
The Best Marble Projects Treat Inspection Like Design
High-end marble isn’t “high-end” because it’s expensive-looking on a sample table. It becomes truly premium when its texture stays consistent across the batch, its hardness behavior is predictable during fabrication and use, and its luster remains stable under real site lighting and cleaning routines.
If you take away one practical rule: inspect the batch like the building will be used—not like the brochure will be photographed. That’s how you get stone that stays calm, luxurious, and trustworthy years after handover—while still delivering the design story your client approved on day one.